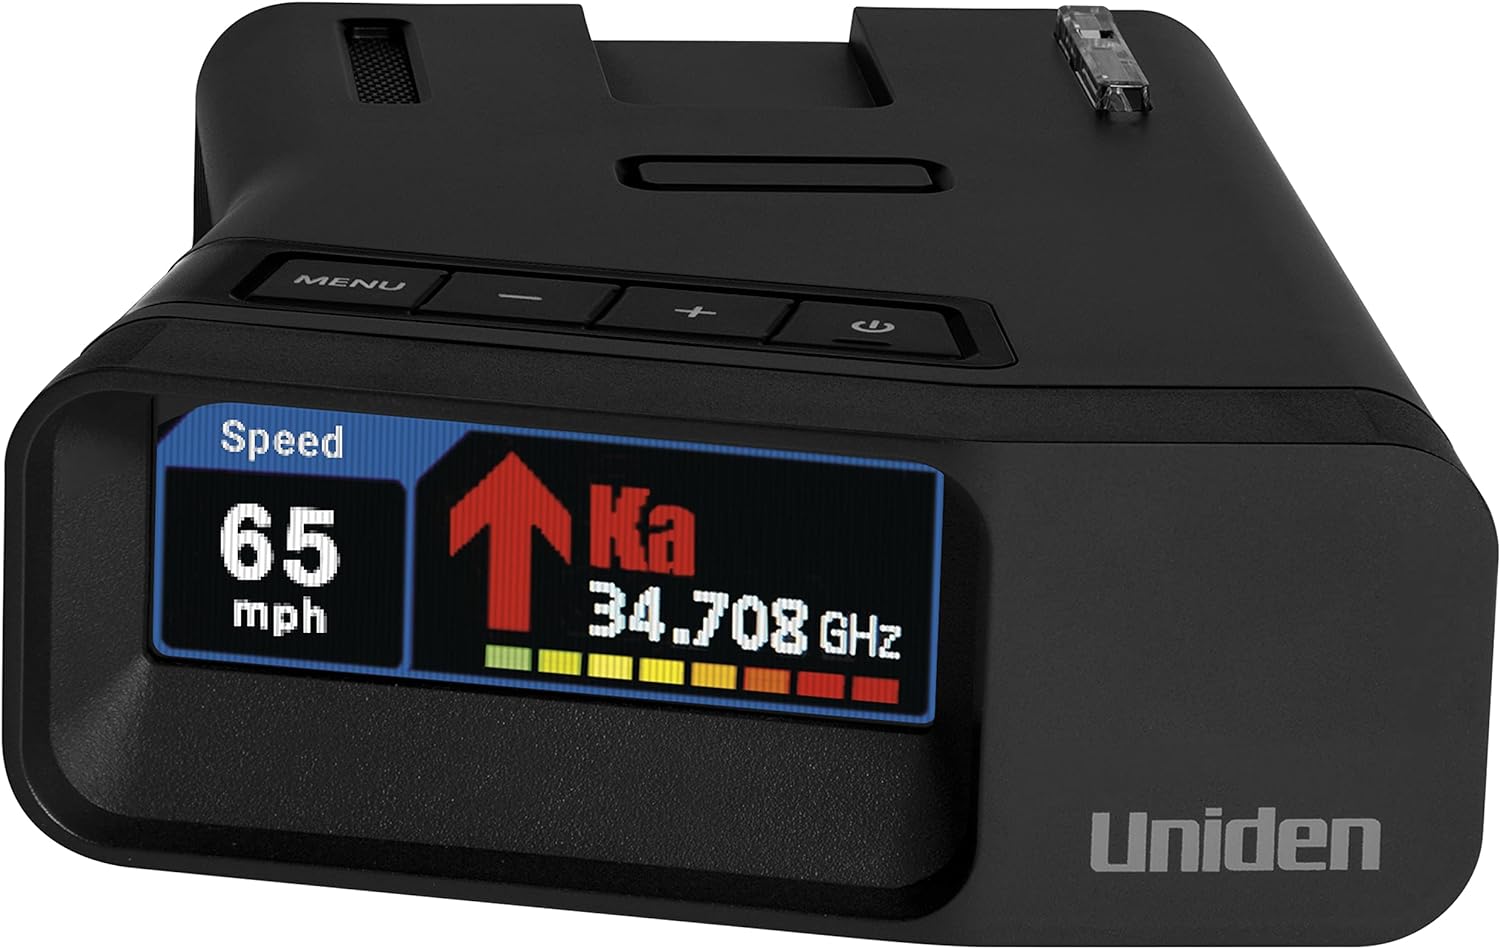
In this video by Nu Horizon C8 on YouTube he shows how to connect a radar detector to your rear view mirror for power so you don’t have to have a long power cord getting in the way.
In this application it allows the radar detector to be hardwired without any soldering wires and hanging cords from the radar detector. In the video he provides a step by step tutorial on how to install the radar detector and shows how you will need this wiring harness and a screwdriver similar to this to make the install easy like he did.
Before you even get started with this you need to decide on a well trusted and tested radar detector for your Corvette C8 to help give you a fair warning of a speed trap or police using radar around you.
As for radar detectors we recommend these two as they have proven testing, have high reviews and give you the best results for picking up laser. Even if the cops are shooting from miles away they can save you money on a speeding ticket or having to get a criminal defense attorney if it’s a criminal speeding ticket.
Here you will see why the Uniden R7 and the Escort Max360 are the two best radar detectors or the Corvette C8 and any car for that matter. They have the best long range laser and Ka band warnings to prevent you from getting a speeding ticket from the police.
In this video Squirrel Cage Garage covers the only ways to get your C8 Corvette into neutral when the engine is off if you don’t want to use car wheel dollies.
When Chevrolet sent out a local service tech from a Chevy dealer in Utah they confirmed and showed a special tool you can use to disengage the DCT/parking pull.
Searching for ways to fix the paint chips especially on the front of your Corvette C8? In this video by NuHorizon C8 he provides a step by step solution.
In some cases Corvette C8 owners take the gamble and don’t add any paint protection film or PPF to their car. When this happens you can start acquiring paint chips along the way especially in high frequency impact points like your front bumper or front hood and fenders.
In this video NuHorizon C8 on YouTube provides a really good detailed video on the step by step process of how to fix and repair paint chips on his Corvette C8. He tests two different products and processes and once you watch the video you will see some great results and outcome.
Regardless of the paint chip repair kit you use whether you go with AC Delco or the preferred Dr. Color Ship you will need really good micro fiber towels like the ones from Chemical guys and a BEST SELLER here on Amazon
How Bad is it? 28k Miles with No Paint Protection C8 Corvette!
Hello all. So its time to check out how the paint looks on the C8 Corvette after 28,000 Miles. I never installed Paint Protection Film, or PPF for short, and its time to see how many paint chips the C8 has collected and check out how effective two different paint chip repair kits can be at covering these up. Its a lot of good information and a good how a good paint chip repair kit can save your car from costly repaint work if you never installed PPF. Enjoy! TIMELINE:
0:00 Introduction 0:32 Paint Evaluation Post 28k Miles 1:39 Prepping Front Bumper Surface 2:08 AC Delco vs Dr Color Chip 2:18 AC Delco Apply How-to 3:39 Dr Colorchip Apply How-To 5:13 Best Paint Chip Repair Method to Use 5:54 Dr Color Chip Final Results 6:41 AC Delco Final Results 7:46 RESULTS SUMMARY
In this video by Brink of Speed on YouTube he shares a step by step process of adding a ceramic coating or ceramic coat to your C8 Corvette.
They mostly use all of Chemical Guys products including Carbon Force ceramic coating. They share all of the products, tools, and the step by step guide on how to make your C8 Corvette look extremely clean and protected from dust, dirt, and water spots.
To ceramic coat a C8 Corvette professionally is anywhere from $1-2k but it does save you time and the cost of buying the products. They take about 3-4 hours to apply a ceramic coat on the C8 Corvette in this video. And the chemical guys package for what you need is usually in the $150 to $200 range and the ceramic kit is about $140 for 2-3 C8 Corvettes. If you didn’t own anything you would have to spend about $350 plus your time to get this done.
Step by Step Process for Applying Ceramic Coating to Car
Wash your car and get it cleaned as best as possible.
Then clay bar the car and use a detail spray or waterless wash
Use a LED light to see any imperfections
Use a wipeout or waterless spray again
C4 clear cut polish on the buffer from Chemical guys and their pad conditioner and keep the buffer on the lowest setting
Panel at a time and keep careful with the edges so you don’t burn any paint
Then switch to the Chemical guys P4 and take the same steps with buffing the car on a low speed.
Final step after two coats of paint correction go back and forth 3 times with the ceramic coating application on the applicator or bar they provide.
Take a clean cloth and wipe it off after a few minutes
In this video from Rick Corvette Conti with Coughlin Chevrolet of Pataskala discusses how to fix squeaky or squealing C8 Corvette brakes with his service corvette technician Chuck Metts.
Chuck mentions Chevrolet wants them to put a copper grease on the brake pads to stop them from chattering in the calipers. It’s Permatex Copper anti seize lubricant and to put a thick layer on the brake pads.
Another option is upgrading your brakes to Girodisc brake rotors and Carbotech Brake pads as we did after ordering the parts from Paragon Performance. We have a Z51 3LT C8 Corvette the J55 brakes are bigger so you have to take the brake calipers off.
There is a bulletin with Chevrolet not a recall that they will fix this issue as long as the C8 Corvette is still under warranty.
Most auto manufacturers recommend changing air filers at about 15,000 miles. With the C8 Corvette there will be a service light that says “Change Air Filter at Next Oil Change Service”.
The C8 Corvette also provides a percentage of what is left on the factory air filter. However, if you want to purchase an aftermarket air filter to increase the life of your air filter and not have to change it as often there are many C8 Corvette air filter options from AFE and Attack Blue.
Our choice would be the Attack Blue air filter since we used it on our C8 Corvette and has slightly better Horsepower and Torque gains then the others. It also is Dry and Washable with just soap and water so you can reuse it as well.
In this video from Paragon Performance they test 3 aftermarket air filters and they were all pretty much the same 6+ HP gain with Attack Blue edging the other two out slight in the HP/Torque numbers.
C8 Corvette Air Filter Shootout! aFe Dry vs aFe 5R vs Attack Blue! | Paragon Performance
Per Paragon Performance C8 Corvette Air Filter Dyno Testing
C8 Corvette drop in air filter showdown! aFe Power Dry VS. aFe Power 5R VS. Attack Blue! Who do you think will win?! We tested all the drop in options for the stock airbox on a bone stock C8 Corvette. Tested on our DynoJet Dynamoter in our enclosed dyno cell.
✍️ By TJ• C8 ZR1 Owner • Former C8 Z06 (×2) & Stingray Owner •@c8corvetteblog (30K+ on IG) • Last updated: October 10, 2026
⚡ QUICK ANSWER
Hard launches break C8 half shafts. The recall is a separate, 22-car problem.
A C8 Corvette breaks a rear half shaft (axle) when launch torque meets more grip than the stock shaft can take: sticky tires, wheel hop, repeated launches or added power. That is separate from GM recall N212351320, which covers 22 cars built in 2021 with missing ball bearings. A stock shaft lists at $428.82.
🏁 THE NUMBERS
22
Cars in GM’s half shaft recall
$428.82
GM list price, stock Stingray shaft
$1,699
Lowest upgraded pair I found listed
1,400 hp
Driveshaft Shop axle rating
I have owned four C8s: a Stingray, two Z06s and the ZR1 I own now. The Stingray is the one that broke a rear half shaft, and it broke on a launch. This page covers what fails, how to tell, which cars are in GM’s recall, what the parts cost on October 10, 2026, and how to launch without doing what I did.
What breaks on a C8 Corvette axle, and why
The C8 puts the engine behind the seats and sends power through GM’s M1L 8-speed dual-clutch transmission. Two rear half shafts carry that torque out to the rear wheels. Each shaft uses constant-velocity joints, and the joint described in GM’s recall filing holds six ball bearings. When someone says a C8 “broke an axle”, this is the part they mean.
A half shaft does not care about horsepower on paper. It cares about how hard the torque arrives and whether the tire gives. Five things raise that load:
Launching from a stop. First gear multiplies engine torque the most, and all of it goes through two shafts.
Sticky tires and prepped surfaces. A tire that can spin limits how hard the shaft gets hit. A drag radial on a prepped lane does not spin, so the shaft takes the full load.
Wheel hop. When the rear tires grip, slip and grip again, the shaft takes repeated shock loads instead of one smooth push. GForce Engineering, which builds upgraded C8 axles, calls wheel hop a significant concern on high-power builds.
The dual-clutch. The DCT delivers torque faster and more consistently than a driver with a clutch pedal. That is why the car is quick, and it is why every launch is a full-load launch.
Added power. Nitrous, boost or a tune raise the torque the stock shafts were sized for.
There is an early example with a paper trail. In March 2020, The Drive reported on LG Motorsports’ new C8 at the TX2K event. It ran a 12.11-second quarter mile without nitrous. On its third pass, with nitrous, the left-rear axle failed and the car waited for a tow truck. The Drive noted that the dual-clutch transmission was fine.
🏁 OWNER TAKE
I broke a rear half shaft launching my Stingray. It was not a recall problem and I do not call it a defect. I asked the shaft to take a hard launch and it let go. If you launch a Stingray often, treat the half shafts as parts you are choosing to stress, and plan for them.
GM’s recall filing describes the result of a failed half shaft in three words: loss of propulsion. The drag strip reports match. The car in The Drive’s story broke its axle on a shift under power and left on a tow truck.
The break itself. The car stops pulling, usually at the hit of a launch or on a hard shift under power.
What to do next. A C8 that loses drive after a launch needs a flatbed, not another try.
Standard CV joint checks. These apply to any car with half shafts, the C8 included: a torn boot, grease thrown onto the inside of a rear wheel, or a new click or vibration under acceleration. Look after any strip day.
⚠️ HEADS UP
A shaft that breaks on a launch and a shaft built without all of its ball bearings are two different problems on the same part. One is load. The other is a factory assembly error on 22 cars. Run your VIN either way.
Which C8s and model years are affected
The launch breaks I can document are Stingrays. The stock Stingray shaft is GM part 85113611, and one GM parts catalog lists it for 2020 to 2026 Corvettes with the 6.2L engine, without Z06, ZR1 or hybrid. So the Z06, ZR1 and E-Ray run different half shafts.
Car
Model years
Half shaft status
Stingray, 6.2L LT2 (490 or 495 hp)
2020 to 2026
Stock shaft 85113611. The car in the launch-break reports, and the one I broke.
Stingray, recall batch
2021 to 2022
22 cars built January 27 to September 28, 2021. Shafts may be missing ball bearings.
Z06, ZR1, E-Ray
2023 and newer
Different shafts than the Stingray, and not part of recall N212351320. The aftermarket sells separate Z06 and E-Ray axles.
Stingray and Grand Sport, 6.7L LS6 (535 hp)
2027
Too new for a failure record.
The GM half shaft recall: N212351320 (NHTSA 22V-091)
GM recall N212351320 is NHTSA campaign 22V-091. It covers 2021 and 2022 Corvettes whose rear half shaft assemblies may be missing one or more ball bearings. GM’s recall report to NHTSA, dated February 18, 2022, lists 22 vehicles built from January 27 to September 28, 2021.
Here is how GM found it. On September 2, 2021, a GM engineer inspected a rear half shaft from a 2021 Corvette that had fractured and left the car without drive. It was missing two of its six ball bearings. The supplier, GKN Automotive, identified 19 suspect VINs on October 16, 2021, and told GM about six more on February 17, 2022. GM’s filing blames a supplier quality spill that let incorrectly assembled shafts pass inspection.
The fix is a new left or right rear half shaft, installed by the dealer at no charge. Dealers were notified on February 17, 2022, and owner letters were scheduled to start on April 4, 2022. GM told NHTSA it knew of no crashes or injuries.
✅ CONFIRMED
The recall number checks out against the federal filing, and the batch is small: 22 cars. If you own or are buying a 2021 or 2022 Stingray, run the VIN at nhtsa.gov/recalls. An open recall there means a free shaft at any Chevrolet dealer.
What a replacement half shaft costs
A stock Stingray half shaft is not an expensive part. On October 10, 2026, GM Parts Direct listed part 85113611 at $428.82 MSRP and $293.30 discounted. The same part fits left or right, and it was a special-order item quoted at 3 to 5 business days, sometimes 7 to 10.
The listing also says the axle nut, washer and retainer plate cannot be reused, so add those to the order. Labor is on top and varies by shop.
Upgraded C8 axles: makers, ratings and prices
Two companies make most of the upgraded C8 half shafts: GForce Engineering (the Renegade and Outlaw axles) and The Driveshaft Shop. These are the makers’ own power claims and the prices listed on October 10, 2026.
Axle
Fits
Maker’s power claim
Listed price
GForce Renegade
C8 Stingray (one dealer lists Z51 cars only)
No rating published. Tested on cars over 1,000 hp
$1,699 pair
GForce Outlaw
2020 and newer C8
No rating published
$2,099 pair
Driveshaft Shop Level 5
2020 to 2026 Stingray, base and Z51
1,400 hp
$1,186.22 per axle
Driveshaft Shop Z06/E-Ray Direct Fit
2024 to 2025 Z06 and E-Ray
1,400 hp
$2,348.96 pair
The cheapest upgraded pair I found was the GForce Renegade at $1,699, listed with a lifetime warranty. The GForce Outlaw was $2,099 and uses billet aerospace alloy bars with one-piece CNC-machined billet steel outer stubs. GForce does not publish a horsepower rating for either. It says driving style and setup vary too much, and that the Renegade has been tested on cars making well over 1,000 hp.
The Renegade reuses the factory inner stub flanges. One dealer listing warns that builds past 1,300 hp may test those factory stubs.
The Driveshaft Shop puts a number on its parts: 1,400 hp. Its Stingray axle uses a 300M bar and 300M internals with a billet chromoly outer CV housing, and it was listed at $1,186.22 by a dealer. That listing names the axle as sold individually while its page title mentions two, so confirm the quantity before you order. The Z06 and E-Ray pair was $2,348.96 on the maker’s own site, with a one-year warranty.
A launch is how the Stingray posts its best 0 to 60 time, which is why people keep doing it. Here is how I would stack the odds now.
Finish break-in first.GM’s 2020 Corvette break-in schedule limits engine torque in the low gears for the first 500 miles and says to avoid full-throttle starts in that window. It also says no track days before 1,500 miles.
Lift if the rear starts hopping. Wheel hop is the shock load. Staying in the throttle through it is how a quick pass ends on a tow truck.
Match the tire to the axle. Street tires that can spin take some of the hit. Drag radials on a prepped lane give it all to the shafts. If you are buying sticky tires for the strip, budget for axles in the same order.
Add axles before you add power. Nitrous, a supercharger or turbos raise the torque past what the stock shafts were sized for. Put the half shafts in the build plan, not the repair bill.
Look at the bushings. GForce recommends cradle and differential bushing upgrades alongside its axles to control wheel hop.
Do not stack launches. Every launch is a full-load event on the same two shafts. Fewer launches means fewer chances.
Video: a C8 Corvette breaks an axle at the drag strip
This is the HorsePower Obsessed video this page was first built around in August 2021, when the Stingray was the only C8 on sale. The title says what happens: he broke his C8, and he calls the part very weak from the factory. The part is a rear axle, and it let go at the drag strip.
Frequently asked questions
Why do C8 Corvette axles break?
C8 rear half shafts break when launch torque arrives harder than the stock shaft can absorb. Sticky tires, a prepped track, wheel hop, repeated launches and added power all raise that load. The dual-clutch transmission delivers every launch at full force, which is why the car is quick and why the shafts take the hit.
Is there a recall on C8 Corvette half shafts?
Yes, a small one. GM recall N212351320, NHTSA campaign 22V-091, covers 22 Corvettes from the 2021 and 2022 model years built between January 27 and September 28, 2021. Their rear half shafts may be missing ball bearings. Dealers replace the affected shaft at no charge.
How much does a C8 Corvette half shaft cost?
A stock Stingray rear half shaft, GM part 85113611, listed at $428.82 MSRP and $293.30 discounted at one online GM parts seller on October 10, 2026. The axle nut, washer and retainer plate are not reusable, and labor is extra. Upgraded aftermarket pairs were listed from $1,699 to $2,348.96.
What is the difference between GForce Renegade and Outlaw axles?
Both are GForce Engineering upgrades for the C8. The Renegade was listed at $1,699 a pair. The Outlaw was listed at $2,099 and adds billet aerospace alloy bars with one-piece CNC-machined billet steel outer stubs. GForce does not publish a horsepower rating for either axle.
How much power can upgraded C8 axles handle?
The Driveshaft Shop rates its C8 axles at 1,400 hp. GForce does not publish a rating. It says its Renegade axles have been tested on cars making well over 1,000 hp, and one dealer listing warns that builds past 1,300 hp may test the factory stub shafts those axles reuse.
Are C8 Z06 axles the same as Stingray axles?
No. GM’s parts listing for the Stingray shaft, part 85113611, excludes the Z06, ZR1 and hybrid cars, so those models use different half shafts. The aftermarket treats them separately too. The Driveshaft Shop sells a dedicated 1,400 hp pair for the 2024 to 2025 Z06 and E-Ray at $2,348.96.
Want more C8 content?
Daily photos, spec drops, and ownership reality from someone who’s owned 4 C8s.
Check out this video from WRPDrive on YouTube where he adds 2 more quarts of DCT fluid to his C8 Corvette with the 13 degree method jacking the car up.
It does look higher than the 13 degrees (1 and half feet) and they had to jack it up pretty high so the transmission fluid wouldn’t leak. This is suppose to help reduce C8 Corvette transmission issues and for track use.
C8 Corvette gets 2 Liters of DCT fluid added through the side filler plug
This is the easier way of adding the 2 liters of DCT fluid. The side filler plug is easier accessed rather than taking out the airbox to access the top plug. Be careful not to drop the 17mm aluminum plug in the skid plating, it will be hard to find.
✍️ By TJ• C8 ZR1 Owner • Former C8 Z06 (×2) & Stingray Owner •@c8corvetteblog (30K+ on IG) • Last updated: October 10, 2026
⚡ QUICK ANSWER
Two splash shields off, two brackets on, no drilling.
The Verus Engineering aluminum rear diffuser for the C8 Stingray (part A0291A, $879.95) bolts to the factory exhaust hanger points with no drilling. Verus rates the install moderate and 2 to 2.5 hours: raise the rear, remove two splash shields, fit two brackets, then hang the main plate, side plates and strakes.
A rear diffuser is one of the few C8 aero parts you can bolt on in a driveway in an afternoon. This guide walks through the Verus Engineering kit for the Stingray using Verus’s own install manual (Rev 01, dated August 19, 2025), then covers what changes if you buy the carbon version or another brand.
⚡ SPECS
Verus aluminum rear diffuser, C8 Stingray
$879.95
Verus list price
2 to 2.5 hr
Verus time estimate
0
Holes to drill
Moderate
Verus difficulty rating
What the Verus rear diffuser is, and what Verus says it does
The Verus Engineering rear diffuser for the C8 Stingray is a sheet aluminum underbody piece that takes the place of the two factory splash shields under the transaxle. It is made from 5052 aluminum, laser cut and press-brake bent, powder coated black, with stainless hardware. It goes on as a main plate, two side plates and two bolt-on strakes.
These are the maker’s claims, not mine. Verus says the diffuser adds downforce and cuts drag compared with a stock Stingray, and improves the lift-to-drag ratio. Verus says it designed the part from its own scan of the car, ran it in OpenFOAM CFD, and then checked it with real-world testing. Verus also calls it the base piece of its Ventus aero kits, built to balance front aero like a splitter and dive planes.
What Verus does not publish today is a downforce number for the diffuser alone. Its product page has none, and its Ventus packet (dated January 22, 2026) gives no standalone figure either. The number most people quote comes from the retailer. Paragon Performance lists 20 lb (9 kg) of added downforce at 80 mph and 29 lb (13 kg) at 100 mph. I found no independent test of either figure.
🏁 OWNER TAKE
Take the seller’s 29 lb at 100 mph at face value and it is still a small number. I would not buy this expecting to feel it on the street. The case for it is as the rear half of a matched setup. Verus itself says the parts can be installed one at a time but recommends the full package so the front-to-rear balance stays safe.
Which C8s it fits: Stingray only, as listed
Verus lists part A0291A for the “Corvette Stingray (C8)” and gives no model years. Paragon’s listing for the same part number is more specific: 2020 to 2026 Stingray, coupe and hardtop convertible (HTC). Nothing I read lists it for a wide body car.
C8 model
Listed for A0291A?
Where it says so
2020 to 2026 Stingray coupe
Yes
Verus (Stingray, no years), Paragon (2020 to 2026)
2020 to 2026 Stingray HTC
Yes
Paragon
Stingray with Z51
Yes
Verus documents name the “Stingray/Z51” platform
2027 Stingray (6.7L LS6)
Not listed
Paragon’s range stops at 2026
Z06, E-Ray, Grand Sport, Grand Sport X, ZR1, ZR1X
Not listed
No mention on either listing
Verus’s manual has no separate steps for Z51 and non-Z51 cars. If you have a 2027 Stingray or any wide body car, including a Z06, ask Verus before you order.
Exhaust matters too, because the diffuser hangs from the exhaust hanger bolts. Paragon says the kit works with the stock exhaust and with aftermarket systems that stay inside the factory exhaust space, and that anything outside that space needs modification. If you are still choosing a system, my Fabspeed vs Soul Performance exhaust comparison is the place to start.
What is in the box
This is the parts list from Verus’s install manual. The kit ships with both stainless and black oxide fasteners for the visible spots, so you pick the look.
Part
Qty
What it does
Main diffuser plate
1
Center section, with strakes already riveted on
Side plates (left and right)
2
Outer sections that tuck up into the bumper
Inner brackets (left and right)
2
Sandwich between the body and each exhaust hanger
Bolt-on strakes
2
Join the main plate to each side plate
M6 x 25mm button-head screws
6
Stainless
M6 x 16mm button-head screws
21 + 14
21 stainless, 14 black oxide
M4 x 16mm button-head screws
4 + 4
4 stainless, 4 black oxide, for the rear of the side plates
M6 serrated nuts
15
Lock the main plate and strake screws
Clip-on nuts
4 + 4
4 in M6 and 4 in M4, for the side plates
Washers
46
Stainless and black oxide, M6 and M4 sizes
You also reuse factory parts: 11 of the original 7mm-head splash shield screws and two clip-on nuts from the first shield you remove.
Tools you need
Jack and jack stands, or a lift
Ratchet or impact
7mm socket (factory splash shield screws)
13mm socket (exhaust hanger bolts)
T15 Torx bit
4mm Allen key or socket (the M6 button heads), plus a 2.5mm Allen, which Verus also lists
Trim tool or clip remover for the plastic push clips
Raise the rear and support it. Jack and stands or a lift. Find the rear splash shields under the transaxle.
Remove the first splash shield. It is held by 11 screws with 7mm heads and 1 plastic push clip. Keep this shield nearby. You need two of its clip-on nuts later.
Remove the full-width shield. That is 6 more 7mm screws, 4 T15 screws and 2 push clips. Neither factory shield goes back on, so store them.
Fit the driver’s side bracket. Find the exhaust hanger inside the exhaust tip, as the manual shows. Remove its two 13mm bolts, slide the Verus inner bracket between the body and the hanger, and thread the bolts back in loosely.
Repeat on the passenger side. Only after the driver’s side bolts are back in. Leave all four bolts loose for now.
Move the clip-on nuts. Lift the tab on each of the two front clip-on nuts in the shield you saved and push them out. Clip them onto the engine splash shield at the spots the manual marks, threaded side up.
Test fit the main plate. Hold it up with the center 7mm screw and the two front 7mm screws. Shift the brackets until the holes line up. Then take the plate back off and fully tighten all four exhaust hanger bolts.
Hang the main plate for real. Use 11 factory 7mm screws plus 4 M6 button-head screws with washers. Put the serrated nuts on the back of the M6 screws finger tight. Leave everything loose.
Prep the side plates. M6 clip-on nuts go in the larger oval holes, M4 clip-on nuts in the smaller round holes, threaded side up on both.
Seat the side plates. Angle each one up into the bumper and push upward until it sits flush and flat against the fender liner. The plate flexes a little. Go slowly here. Then loosely add two M6 x 16mm screws at the front and one M4 x 16mm screw at the rear of each plate.
Add the strakes. One strake goes between the main plate and each side plate. An M6 x 16mm screw, washer and serrated nut clamp the three layers. Use the slots to match the height and angle of the strakes riveted to the main plate.
Tighten in order, then lower the car. Check that every section lines up with the car and with each other. Tighten the strakes, then the main plate, then the M4 side plate screws, then the M6 side plate screws.
⚠️ HEADS UP
Keep one exhaust hanger bolted up at all times. Finish the driver’s side before you touch the passenger side. Verus publishes no torque values for the aluminum kit, so there is no number to give you here. Verus also says it is not responsible for damage, and to get professional help if you are not sure you can do the job safely.
One tip from the manual is worth repeating. Verus suggests running the M6 button heads in with an impact and a 4mm Allen socket. The serrated nuts bite on their own that way, so you do not need a wrench on the back side.
Verus’s manual says 2 to 2.5 hours and rates the difficulty moderate. Paragon’s listing says 3.0 hours. Plan on an afternoon the first time.
Verus lists the aluminum kit at $879.95 as of October 10, 2026. When this post first went up in July 2021, it showed the kit at $749.99 at Paragon. The carbon version (part A0422A) is $2,299.95 at Verus, which is $1,420 more.
The mistakes that cost you time
Pulling both exhaust hangers at once. The exhaust needs one hanger holding it the whole time.
Putting the first shield away too early. Two of its clip-on nuts move to the engine splash shield. Pull them before the shield goes on a shelf.
Tightening the hanger bolts before the test fit. The brackets need to float until the main plate holes line up.
Clip-on nuts facing the wrong way. Threaded side goes up, on the shield and on both side plates.
Forcing a side plate into the bumper. The manual warns the bumper can be damaged at that corner. Angle it in, then push up.
Tightening as you go. Everything stays loose until all the sections line up. Then tighten in the order in step 12.
Not checking your exhaust first. A system that sits outside the factory exhaust space needs modification, per Paragon.
What the Paragon Performance install video shows
This is Paragon Performance’s install video for the same Verus kit, and it is the one Paragon still embeds on its A0291A listing. Going by its chapter list, it covers tools at 0:29, then the rear wheels come off at 1:04 and the mud flaps at 1:24. The panels come down at 2:02. The brackets go on at 3:28 and the diffuser at 4:31. Side panel hardware starts at 7:34, the side panels at 8:34 and the strakes at 8:52. The mud flaps go back on at 10:08.
One difference to know about. The video takes the rear wheels and mud flaps off. Verus’s current written manual lists neither step. My read is that the extra room at the corners helps when you seat the side plates, so if a side plate fights you, that is worth trying.
Installing a different brand of C8 rear diffuser
The Verus aluminum kit is one way to do it. Two other published install procedures show how much the job changes from part to part.
Verus carbon diffuser (A0422A)
One carbon piece and two brackets. Verus rates it beginner level and 1 to 1.5 hours. The same splash shields come off (17 screws with 7mm heads, 4 T15 screws and 3 push clips in total) and it uses the same 13mm exhaust hanger bolts, one side at a time. The manual says to tighten the hardware only a few foot-pounds, because overtightening can crack the carbon. It also warns that the diffuser’s edges are rough and can scratch paint during the test fit.
ACS Composite diffuser insert
A different kind of part: an injection-molded insert for the rear valance, listed by ACS for the 2020 and newer Stingray with or without Z51. ACS says it installs in under an hour and that a lift is optional. It does need four holes drilled in the unpainted undercarriage pan. ACS says Corsa x Lingenfelter and AWE exhausts do not fit it out of the box.
Whatever brand you buy, answer these before the car goes up in the air:
Where does it mount? Exhaust hanger bolts, factory shield screws, or new holes.
Does it need drilling, and where? Verus says none on the car. ACS says four holes in the undercarriage pan.
Does it clear your exhaust? Paragon and ACS both flag aftermarket systems.
Which factory panels come off for good? Bag and label them so the car can go back to stock.
Is it listed for your car? Everything in this guide is listed for the Stingray.
If the diffuser is going on because the car is headed to a road course, read how to prepare a C8 Corvette for the track first. The prep list matters more than the aero.
How long does a C8 Corvette rear diffuser install take?
Verus rates its aluminum Stingray diffuser at 2 to 2.5 hours and moderate difficulty. Its carbon diffuser is rated 1 to 1.5 hours and beginner level. Retailer Paragon Performance lists 3.0 hours for the aluminum kit. ACS says its diffuser insert takes under an hour.
Do you have to drill to install the Verus rear diffuser?
No. Verus says its C8 Stingray rear diffuser needs no drilling or fabrication. Two brackets sandwich between the body and the factory exhaust hangers, and the main plate reuses 11 of the original splash shield screws. Other brands differ. The ACS insert needs four holes in the undercarriage pan.
What tools do I need for a rear diffuser install?
For the Verus aluminum kit: a jack and stands or a lift, a ratchet or impact, 7mm and 13mm sockets, a T15 Torx bit, a 4mm Allen key or socket, and a trim tool for the push clips. Verus also lists a 2.5mm Allen key.
Does the Verus C8 rear diffuser fit the Z06?
It is not listed for it. Verus lists part A0291A for the C8 Stingray, and Paragon’s listing narrows that to the 2020 to 2026 Stingray coupe and hardtop convertible. Neither mentions the Z06, E-Ray, Grand Sport or ZR1. Confirm with Verus before ordering for a wide body car.
How much downforce does the Verus C8 rear diffuser add?
Verus does not publish a standalone figure on its product page today. Retailer Paragon Performance lists 20 lb (9 kg) at 80 mph and 29 lb (13 kg) at 100 mph for the aluminum diffuser. Those are seller figures. I found no independent test that confirms them.
How much does the Verus Engineering C8 rear diffuser cost?
As of October 10, 2026, Verus lists the aluminum rear diffuser (part A0291A) at $879.95 and the carbon rear diffuser (part A0422A) at $2,299.95. That is a $1,420 difference. Both prices are for the part only and do not include installation.
Want more C8 content?
Daily photos, spec drops, and ownership reality from someone who’s owned 4 C8s.
✍️ By TJ• C8 ZR1 Owner • Former C8 Z06 (×2) & Stingray Owner •@c8corvetteblog (30K+ on IG) • Last updated: October 10, 2026
⚡ QUICK ANSWER
Filter at 7,500 miles, then 22,500. Fluid every three years.
GM’s schedule for the C8 Corvette’s Tremec dual-clutch transmission calls for a new external canister filter at 7,500 miles, again at 22,500 miles, then every 22,500 miles. The transmission fluid is due at least every three years. GM pays for the first filter change only. Every later filter and every fluid change is on the owner.
I have owned four C8s (a Stingray, two Z06s and the ZR1 I have now) and daily driven them for years. The DCT filter is a small job with a big warranty attached, because GM reviews maintenance records on transmission claims. Here is what GM requires, what it costs, how hard each job is, and what the warranty does when the DCT acts up.
🏁 SERVICE SCHEDULE
C8 dual-clutch service at a glance
First filter
7,500 mi
12,000 km, GM pays once
Next filters
22,500 mi
then every 22,500 miles
Fluid change
3 years
at the latest, owner pays
Powertrain warranty
5 yr / 60K mi
covers the transmission
What GM’s maintenance schedule requires, and when
The C8’s 8-speed dual-clutch is built by Tremec, and GM’s service articles call it the TR-9080. It has an external canister filter that GM treats as scheduled maintenance. GM’s TechLink article for dealer technicians sets the first filter change at 7,500 miles (12,000 km) and every 22,500 miles (36,000 km) after that. The letter GM mailed to owners, published by CorvetteBlogger in November 2024, names the odometer points: 7,500 miles, then 22,500 miles, then every 22,500 miles. That puts the filter services at 7,500, 22,500, 45,000 and 67,500 miles.
The fluid runs on a clock. The owner’s manual text GM quotes in that article says the transmission fluid must be changed at least every three years. If the car shows CHANGE TRANSMISSION FLUID SOON, you have the next 1,000 km (about 620 miles) to change both fluid and filter. If fluid life reads below 10 percent, replace both.
Service
When it is due
Who pays
First canister filter
7,500 miles
GM, one time
Second canister filter
22,500 miles
Owner
Later canister filters
45,000, 67,500, 90,000 miles
Owner
Transmission fluid
Every 3 years at the latest
Owner
After a replacement transmission
7,500 miles after install
GM, if the free one is unused
The details that catch people out:
Why 7,500 miles. GM says break-in wear creates the most contaminants, and its warranty bulletin states the transmission is not fully broken in until 7,500 miles.
Early does not count. A filter replaced more than 500 miles before 7,500 has to be replaced again within 500 miles of 7,500, and GM does not pay for the early one.
The window. GM engineering says plus or minus 1,000 miles should not hurt anything. The free service is claimable from 7,000 miles, or once the cluster shows Replace Transmission Filter Soon.
The reminder. Starting with the 2023 model year, the cluster shows a message shortly before 7,500 miles and every 22,500 miles after. GM notes it cannot be reset the way the oil life monitor can.
Low-mile cars. On 2024 to 2026 cars the free filter is good for three years from purchase. Under 7,000 miles at that point, it becomes your cost.
Overdue cars. GM tells dealers to replace the filter, run the hydraulic system flush, then fit a second filter. Flushing first would push debris back through the system.
Which model years and models this covers
GM’s article names 2020 to 2024 Corvettes under transmission codes M1L and M1M. M1L is the code GM pairs with the Z51 package, so that is the Stingray unit. A third code, MLH, appears in GM’s 2025 repair article covering 2020 to 2025 cars. The warranty side is GM bulletin 24-NA-081, which covers the 2024 and 2025 Corvette as a model line and carves out no variant. CorvetteBlogger reported in November 2025 that 2025 and 2026 buyers sign a form at delivery confirming the same window: 7,000 to 8,000 miles, inside three years.
I could not find a GM document that sets a different interval for the Z06, E-Ray, ZR1 or ZR1X, or one that changes the numbers for 2027 cars. The schedule in the owner’s manual for your model year is what GM will hold you to. One procedure change is on record: for 2026 and newer cars, GM told dealers they can skip the hydraulic flush during the filter change, per CorvetteBlogger’s March 2026 report. The flush is still part of the fluid change.
Parts: the filter, the fluid and how much it holds
GM specifies DCTF FFL-4 C8 Corvette transmission fluid. It is sold in 1-liter (1.06-quart) bottles under GM part number 19418016. GM tells technicians to shake the bottle hard before pouring, and a sealed bottle has a three-year shelf life. The filter comes as a canister filter kit. A GM parts vendor on Canadian Corvette Forums quoted it as part number 24045729 in May 2025. Part numbers get superseded, so confirm it against your VIN.
Capacity is where the two jobs split. One Corvette parts vendor lists the transmission’s approximate overhaul capacity at 11.62 quarts, about 11 liters. The canister filter holds 4 to 6 ounces, according to the forum vendor, and GM allows the dealer one quart for top-off during a filter service.
What dealers charge versus DIY parts cost
GM publishes no retail price for either service. The dealer numbers below are owner-reported quotes from the threads that rank at the top of Google for these searches, so read them as a range. Parts prices are as listed in October 2026.
Item
Price
Source
What GM pays a U.S. dealer for the covered filter service
$250
GM bulletin 24-NA-081
Dealer filter change, owner-reported
$800
r/C8Corvette thread
Dealer fluid and filter, owner-reported
$1,300+
CorvetteForum thread
Canister filter kit, DIY
$195 to $199.99
Wildhammer Motorsports, Paragon Performance
FFL-4 fluid per liter, DIY
$42.00 to $46.18
Wildhammer Motorsports, Paragon Performance
GM reimburses a U.S. dealer $250 for the covered filter service, while owners have posted retail quotes of $800 for the filter and more than $1,300 for fluid and filter. In parts, the filter kit is $195 to $199.99 and the fluid is $42.00 to $46.18 a liter. A DIY filter change is one kit plus a liter for top-off, about $240. A full fluid change at $42.00 a liter is $462 in fluid if you buy all 11 liters. The gap is labor: the forum vendor says dealers book 3.5 hours for the filter alone.
The DCT filter change in outline
This is an outline so you can judge the job, not a replacement for GM service information. I am not printing torque values I cannot source.
Get the car in the air. You need a lift or tall, stable stands.
Remove the underbody panels. Two panels held by 41 bolts, per the forum vendor.
Swap the external canister filter. Expect to lose 4 to 6 ounces of fluid.
Top off and check the level at the inspection plug, with FFL-4 from a shaken bottle.
Flush, depending on model year. Through 2025 the dealer procedure included a hydraulic system flush run with a scan tool. On 2026 and newer cars GM lets dealers skip it.
Keep the filter receipt with the mileage and date. GM’s article tells owners who do their own service to do exactly that.
Why the fluid change is the harder job
Volume. About 11 liters of capacity against a few ounces for the filter. The forum vendor notes the transmission does not drain completely, so the final level check matters.
The flush. The hydraulic system flush is still part of the fluid change. It runs through GM’s dealer scan tool (GDS2 with the MDI interface) or an aftermarket tool that can command it.
The reset. The owner’s manual requires the Fluid Life System to be reset afterward.
The fill points. There is a side fill plug and a top plug under the airbox. The side plug is easier to reach.
DIY makes sense if
It is the 22,500-mile filter or later, which GM does not pay for
You have a lift or tall stands
You keep receipts with mileage and date
Use the dealer if
It is the first filter at 7,500 miles, because GM pays
It is the fluid change and you cannot run the flush or the reset
The filter is overdue and needs filter, flush, filter
🏁 OWNER TAKE
I would let the dealer do the 7,500-mile filter every time. GM pays for it once, and the claim puts the service in the records GM reviews on a transmission claim. After that the filter is a fair driveway job. The fluid change is the one I would pay for.
Video: Paragon Performance changes a C8 DCT filter step by step
Paragon Performance walks through the canister filter change start to finish, including the tools you need. The video has been on this site since June 2021, so the car is an early Stingray and it predates the flush guidance above. The mileage points in its description match GM’s schedule.
Track use: the extra two liters
GM has a separate rule for track days. A Stingray with the M1L transmission and Z51 gets two additional liters of fluid before track use. Transmissions coded M1M or MLH need no track fill, and neither does any car with what GM calls a Die 3 case, which bulletin 23-NA-156 identifies. The side-plug method is in how to add the extra DCT fluid, and the rest of the checklist is in how to prepare a C8 for the track.
Will GM replace your C8 transmission? What the warranty covers
The DCT falls under Chevrolet’s Powertrain Limited Warranty, which Chevrolet lists as typically 5 years or 60,000 miles, whichever comes first. Bumper-to-Bumper coverage is 3 years or 36,000 miles. Per Chevrolet’s warranty page, transmission coverage includes the case, internally lubricated parts, seals, gaskets and internal electrical components.
Coverage is tied to maintenance. GM says missing canister filter service may affect coverage, and a previous owner’s missed service can count against you, so ask for filter records before you buy a used C8. The exception GM names is case porosity, which is not affected by missed maintenance.
Repair or replace depends on the fault. Until September 2025, a park lock valve fault meant a complete transmission. GM has since released parts and a service procedure for the valve and harness on 2020 to 2025 Corvettes. CorvetteBlogger puts a replacement transmission at $20,000 or more. The owner cases this site followed in 2021 and 2022 ended three ways: a control module reset and relearn, a valve body, or a new transmission under warranty.
Known C8 DCT issues GM has documented
Issue
Cars
What GM did
Gasket leaks, and debris on the park position sensor magnet
2020 to 2021
Filed paperwork with NHTSA, reported December 2021, and had dealers send in 7,500-mile filters (GM Authority)
Park sensor drift
See bulletin
Service bulletin 23-NA-176
Dislodged snap ring in the direct clutch assembly
See bulletin
Service bulletin 23-NA-197
Park lock valve faults
2020 to 2025
Valve and harness parts released September 2025
Everything in that table is a service bulletin or a GM technician article, not a safety recall. A bulletin is applied when a car shows the symptom. To see recalls open on your car, run the VIN at nhtsa.gov/recalls. The wider list is in my C8 Corvette problems guide.
Warning signs, and what to do when the DCT throws a fault
A message telling you to put the car in park and take it in for service.
Fluid leaking from the transmission.
A hard jerk on the shift from first to second, or a car that will not shift.
A check engine light with new noises from the transmission.
Replace Transmission Filter Soon and CHANGE TRANSMISSION FLUID SOON are maintenance reminders, not faults. For a real fault, this is the order I would work in:
Photograph the message and write down the mileage.
Do not throw a filter at it. GM says a filter change will not repair a transmission that is already showing symptoms or setting codes.
Get it to a Chevrolet dealer with your filter and fluid records. Inside 5 years or 60,000 miles it is a powertrain warranty claim.
Ask whether the fault matches 23-NA-176, 23-NA-197 or the park lock valve repair.
If the transmission is replaced, the next filter is due 7,500 miles after the install, and GM says to drive it like a new car for the first 1,500 miles (2,400 km).
Not every driveline failure is the gearbox. I broke a rear half shaft launching my Stingray, which is an axle problem, not a DCT problem.
Frequently asked questions
How often should the DCT filter be changed on a C8 Corvette?
GM calls for the external canister filter at 7,500 miles, again at 22,500 miles, and every 22,500 miles after that. Changing it early does not move the schedule. A filter done before 7,000 miles still has to be done again near 7,500.
How often does the C8 Corvette transmission fluid need to be changed?
At least every three years, according to the owner’s manual text GM quotes for dealers. It is also due when the car displays CHANGE TRANSMISSION FLUID SOON, which gives you about 620 miles, or when fluid life reads below 10 percent.
How much does a C8 Corvette transmission fluid change cost?
GM publishes no retail price. Owners have posted dealer quotes of $800 for the filter change and more than $1,300 for fluid and filter together. In parts, the filter kit is about $195 to $200 and FFL-4 fluid is $42 to $46 a liter.
Is there a recall on the C8 Corvette transmission?
The DCT fixes covered here are service bulletins, including 23-NA-176 for park sensor drift and 23-NA-197 for a dislodged clutch snap ring, not safety recalls. Bulletins are applied when a car shows the symptom. Check your VIN at nhtsa.gov/recalls.
How much does a C8 Corvette transmission replacement cost?
CorvetteBlogger puts a replacement dual-clutch at $20,000 or more. Inside the 5-year, 60,000-mile Powertrain Limited Warranty a covered failure is repaired at GM’s cost, and GM reviews your maintenance records on the claim. Park lock valve faults on 2020 to 2025 cars can now be repaired instead.
Want more C8 content?
Daily photos, spec drops, and ownership reality from someone who’s owned 4 C8s.